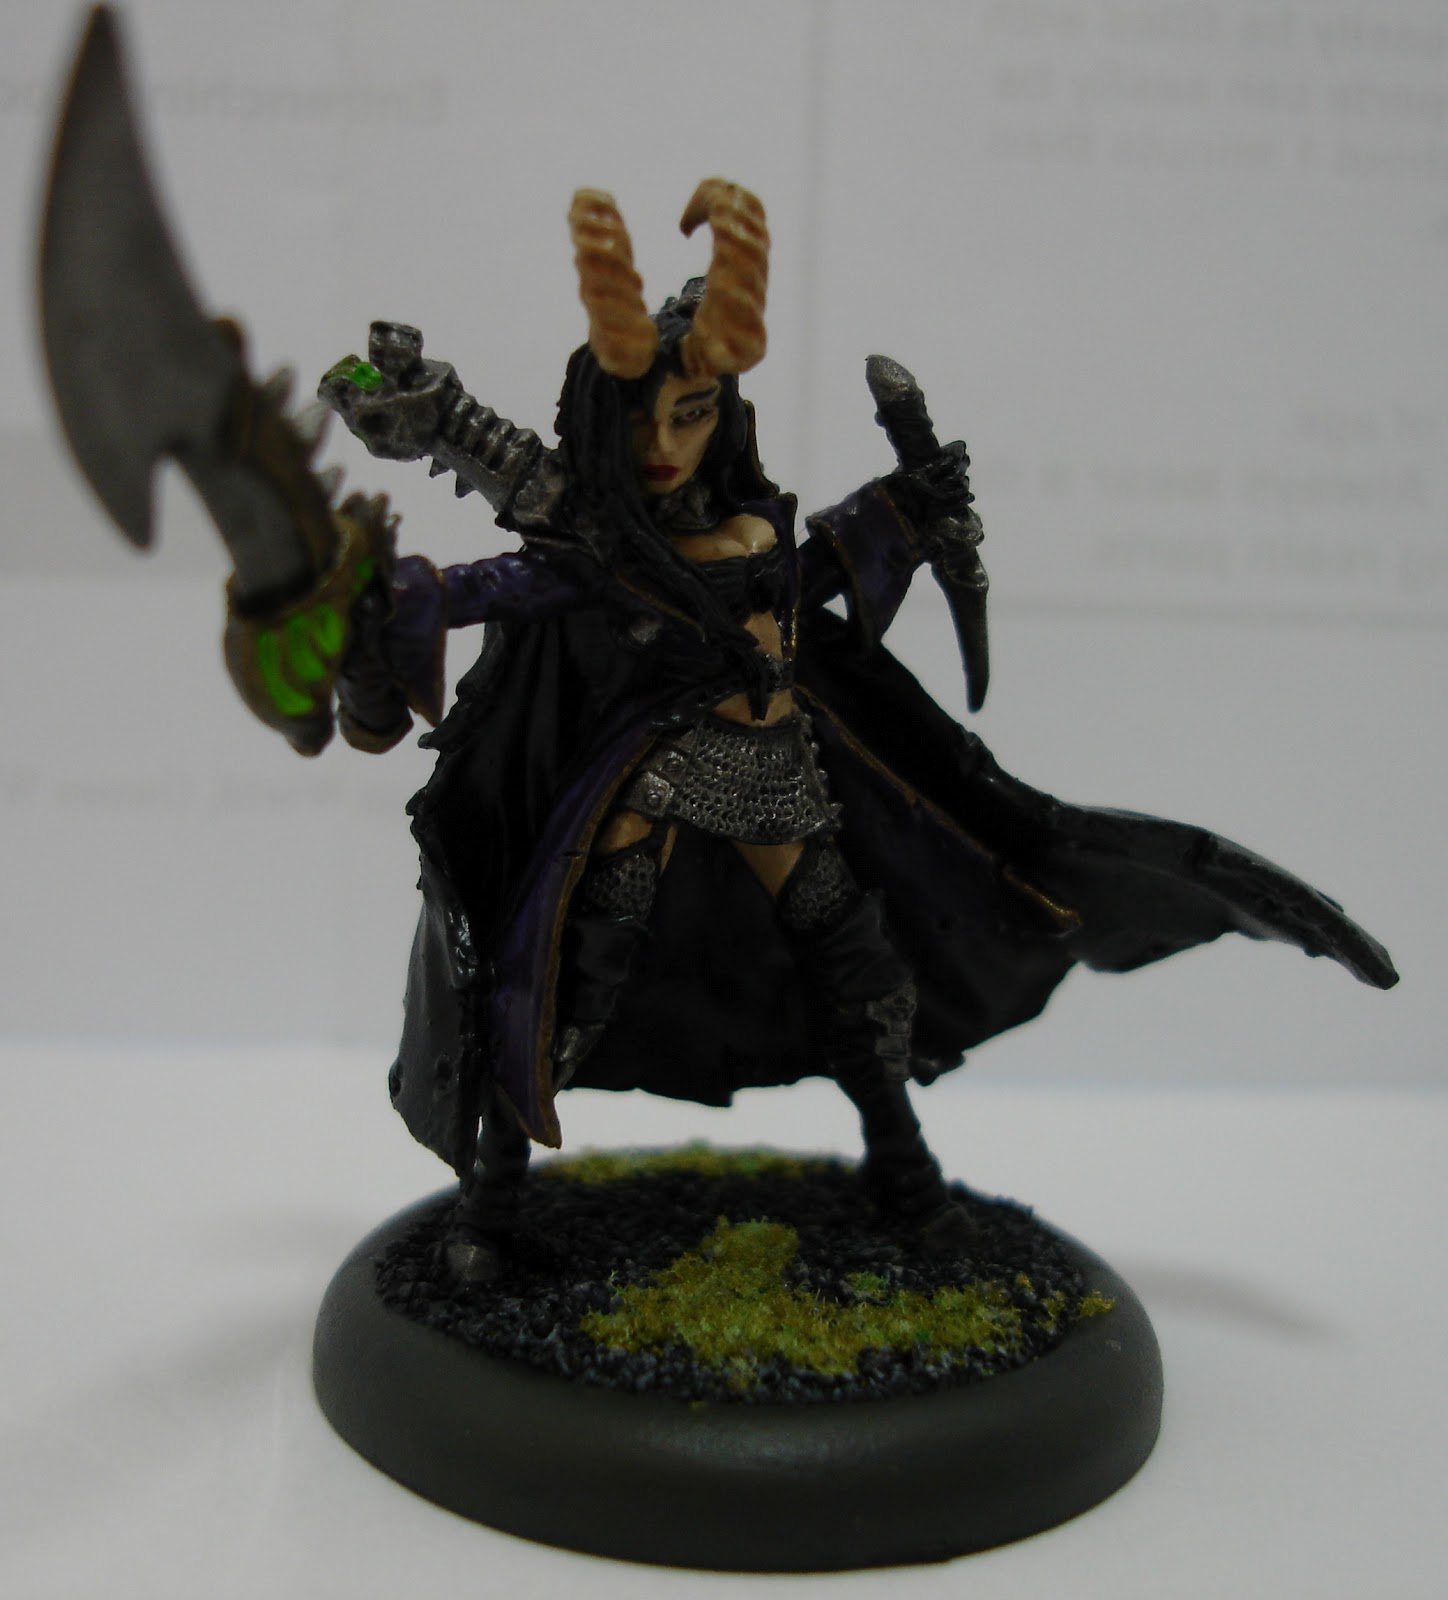

My first spotlight! At a glance Skarre looks impressive, lots of attacks with interesting special effects on each of her weapons, awesome feat, good spell list and stats, and to top it off she even gets a special action. Skarre offers a nice mix of support and do it yourself aggression. Most of her spells, abilities and feat require her to mix in with her army and that puts her pretty close to the enemy. Although as Cryx she is always able to take arc nodes a plenty to gain some distance with her spells, she may not need to hide too much given her defensive qualities.
Skarre has high defense, tied for the highest in faction, and her armor is respectable given her ability to increase it quite easily. Being a Satyxis she is quite fast matching raiders in speed but loosing a tiny bit of threat by not having a reach weapon. Skarre is a melee fighter, boasting higher than average mat and an awesome spell that increases her chances of hitting, adding that she has knockdown on her horns she may well be the best "hitter" in the Cryx faction. While hitting the enemy poses no problem to Skarre, getting past their armor might be a little rough. Skarre doesn't hit very hard without the help of her feat and life trader, so she may have to lose a bit of her own life to start doing serious damage! Skarre has less than average focus for a Cryx Warcaster but higher than average command.
Weapons:
Takkaryx: Skarre's primary weapon. P + S 13 magical blade with life trader. Every time Skarre hits with this sword she can suffer one damage point and gain an additional die on the damage roll against the model hit. This is one of the ways Skarre can mitigate her low strength. The key in this ability is that it adds a die to the damage roll rather than boosting the damage roll. This means you can use life trader and boost your damage roll giving Skarre four dice, making her a pseudo weapon master. The only downside is no reach.
Bloodwyrm: Skarre's offhand. P + S 9 magical dagger with life drinker. When Skarre destroys a living enemy model with this dagger she heals herself for d3 damage. Now at first it looks great since Skarre will be causing herself some harm with her sword and her feat. This is not really the case! Rarely is Skarre sent off to kill a few infantry models, that makes this dagger very situational at best. Again not having reach hurts the potential of this weapon. If your opponent is cautious about you trying to heal up they may just spread out enough that you can only get one model engaged at a time. Now you might find yourself chasing a model or two for a tiny bit of healing and possibly exposing yourself to other threats. On the other hand, if you do find yourself surviving an assassination attempt by a couple living models it might be nice to clear them out and heal up a little in the process.
Great Rack: Skarre's rack of course! P + S 10 horns with knockdown. A great opener on targets with high defense. Knocked down opponents are hit automatically in melee, witch just makes the job so much easier for the rest of her attacks. It helps the rest of her army hit those high defense targets too, assuming they don't die to Skarre in the process.
Feat:
Blood Magic: One of the best feats in Cryx and certainly the game. Skarre can suffer up to five damage to gain +1 strength and armor for each point. This bonus applies to all friendly faction models in her control area, while they are in it (an aura not a pulse). This effect lasts for one round making it equally defensive and offensive. It would be hard to truly list all the uses and combinations this feat allows but I will try to list some. First the most obvious benefit +5 strength. Lots of damage potential on feat turn. Skarre's whole army can hit like dump trucks if you set up your lanes properly. The bonus is even better on armor piercing models as they generally start with low pow. Cankerworm damaging a Khador jack on dice +6 anyone? Yes please. Another benefit of the strength boost is power attacks. Higher chance to pull off throws, even one handed. And power attack damage based off of strength becomes not only utility but dangerously damaging (slamming etc.).
On the defensive side of Blood Magic your troops will be much harder to throw. They will have +5 armor making some almost invincible and others much more resilient. Blast damage will not phase you unless it has a continuous effect on it. Your troops can use the feat defensively to cover as much ground as fast as possible when fighting a ranged army and weather a round of shooting. The higher armor may allow for some of your engaged troops to disengage without fear of free strikes auto killing them. When all else fails, if you had a terrible assassination run, you can be assured that your opponent will have to dedicate much more resources to counter attack your army.
Spells:
Backlash: Mid range offensive upkeep spell that targets enemy warjacks belonging to a battlegroup. Every time the jack is damaged it's controller suffers one damage point. Not a bad spell if you want to start picking away at an enemy Warcaster. Obviously it does nothing against Hordes. I find that this spell is best used with an arc node early in the game. It can make your opponent change their plan after the first turn. Almost like psychological warfare, they may not want to commit a jack as fully as they had planned, lessening their attack and overall strategy. It may also cause them to use up resources to remove the spell. Being our only upkeep however is not going to prevent them from doing something better with those resources. For good times combo this spell with Satyxis Raiders and double backlash enemy Warcasters.
Blood Rain: Mid range offensive AOE that hits for a reasonable amount and causes continuous corrosion damage. This spell is great for clearing out high defense and high armor infantry models with one wound each. The reason being is that no matter how high your armor is corrosion will still do one point of damage (assuming it doesn't go out). As far as high defense goes; it's an AOE, it will scatter and their are ways to make sure it scatters on target. Another spell that can be use to great effect early by forcing your opponent to spread out more than they wanted to or forcing your opponent to give up shield wall. Another sneakier use is to run one of your own models into a position where the spell will have greatest effect then nail them in the back. Best done with Scrap Thralls since they are easy to hit, dirt cheap and they also explode when they die for a double whammy!
Dark Guidance: The spell of spells! While in Skarre's control area, friently faction models gain an additional die on their melee attack rolls. This spell is what makes Skarre amazing in my opinion. It has many obvious benefits and a few that are less obvious. First it makes hitting really easy for most of her army, mat 5 and 6 are no longer bad. It adds an extra dice which can then be further boosted if need be by models that can boost. Dealing with super high defense is no longer a problem. An extra die increases the chance for Satyxis Raiders getting critical knockdowns. Increasing the chance of a chain attack from a Seether since all it needs to do is hit it's target twice. And of course ensuring critical maneuvers like applying the Blood Hag's dispel, a Stalker's grievous wounds and a Warwitch Siren's shadow bind. Gerlack Slaughterborn is unstoppable with his killing spree as long as their are enough enemies for him to munch through.
Some of the less obvious benefits: More flexibility in building character restricted lists, no longer needing Tartarus' curse so that Banes can hit stuff. Not dependent on the Withershadow Combine to dispel stuff or help Gerlack with re-rolling a miss. Skarre can have a large infantry army, with dirt cheap models such as Mechanithralls, who hit really hard and now have a reliable chance of hitting their target.
Hellfire: A long range hard hitting attack spell. This spell causes the model/unit hit by it to take a command check or flee. A great spell for sniping your opponent's important models given the higher than average range and pow. The added effect of making enemies flee is very situational at best and should not be used with the hopes that someone is going to run away.
Ritual Sacrifice: Skarre's other very important spell. This spell removes a friendly warrior model from play and grants Skarre an additional d6 focus on the following turn. According to an Infernal ruling on the Privateer Press forum the d6 focus is rolled as the spell is cast. This ruling makes this spell one of the first things you should do in your turn so you can plan accordingly. Now one might think the price is too high, costing a third of Skarre's focus for the randomness of a d6 later. This is where the Skarlock Thrall comes in to cast it for free. Additionally if you use the Skarlock you can see how much focus Skarre will have on the next turn before activating Skarre. Not a huge advantage though since most of the time you will be activating Skarre early in your turn.
A free d6 of focus per turn is nothing to scoff at considering it can potentially double Skarre's focus however, it does have a price. The best models to sacrifice in my opinion are Scrap Thralls. They are a third of a point each which is great and sacrificing them removes them from play so you don't have to worry about blowing yourself up (deathburst). Another great candidate would be the Stitch Thralls that come with your Necrosurgeon. If you don't have a need for them to collect Mechanithrall tokens they become perfect sacrifice targets. Mechanithralls themselves are also good targets as they are a half point each. And finally I have found my Blood Witches to be sacrifice targets more often as well.
A few notes; if ritual sacrifice rolls a 6 and Skarre uses her feat on the same turn she gets the 6 focus, she can camp her armor to 32! She can safely cast a dark guidance and even boost a couple attacks if needed and still be fine. This is what makes the Infernal ruling so good, is that you can plan for a nasty turn if you roll high and can position well. You could also use the foreknowledge to set up some jacks for good charges with plenty of focus on each. Or put an arc node in a good spot for a hellfire assassination run casting it up to four times, or three with boosts. And finally this focus is not allocated or replenished it is gained, so effects and feats that prevent allocation are bypassed.
Special Action:
Sacrificial Strike: Skarre's only special action is a great one. Skarre targets a model in her LOS and in her command range, then she removes a friendly faction trooper model within one inch of her from play. The model she targeted will suffer a magical damage roll with POW equal to the base armor of the removed model. A couple of things to note. This is a magical damage roll, so it's great for taking out incorporeal enemies. This is not an attack, meaning no cover/concealment, no roll to hit and it bypasses effects that make models immune to attacks (epic Skarre's feat etc.). It's great when you use high arm troopers like Bane Thralls and Knights, just make sure the trade is worth it since you are sacrificing your own model to do this. Although sacrificing a cheap model like a Mechanithrall to kill a key solo or UA is a great option.
List Building:
Skarre loves infantry for many reasons. She makes them hit more often (dark guidance). She makes them hit harder (blood magic). She can make them survive the onslaught of a shooting army long enough to charge (blood magic). She needs bodies to screen her and her vulnerable support models. She loves to sacrifice her own soldiers. She is not just an infantry caster though as it is possible to have a high enough focus to support a jack or two (ritual sacrifice). Blood magic and dark guidance also work just as well for jacks as they do for infantry, lowering the need for jacks to boost thus making them more efficient. Skarre can make use of an arc node or two as well with three offensive spells. So in all I think a mixed list is a solid bet for Skarre, but more appropriately one that leans toward the infantry heavy side of things.
Light Jacks:
Skarre tends to play pretty close to the enemy which reduces the need for an arc node. Her offensive spells are not at all necessary either. I tend to use only one arc node with Skarre and often no arc node at all. I would suggest melee variants if you do take arc nodes since they synergize so well with dark guidance and her blood magic. If you have the extra point and truly don't need it elsewhere, upgrading a Deathripper to a Ripjaw is definitely worth considering. I don't find myself with an extra point very often though. Cankerworm is another light jack that plays well with Skarre being melee focused and able to cause some serious hurt to heavy jacks. Stalkers are worth considering as well for their grievous wounds and other abilities. And Helldivers popping up to slam with +5 str from blood magic can be pretty helpful in clearing lanes to your knockdown targets.
Heavy Jacks:
Skarre doesn't really lean any particular direction in the heavy jack department. Jacks that can be self sufficient are always welcome; Harrower threshing with three dice on his melee attacks is nice or a Seether ensuring he hits with both claws to pull off a grab and smash. The simple Slayer is a viable option with Skarre too since his biggest weaknesses can be overcome with dark guidance and blood magic. Skarre doesn't help the ranged game at all though, so ranged jacks like the Leviathan gain nothing in her army. The only real exception i can see is the Reaper. He gains little from Skarre since he shoots a harpoon and has sustained attack on his helldriver, but it's more of what he can do for her than the other way around. He can move models closer to her army and clear lanes for other models. Given that Skarre has no way to increase threat ranges this can really help out.
Thanks to BeardyDan over on the Privateer Press forums we have another heavy jack to discuss; the Desecrator. The Desecrator is our newest jack and it's melee weapon has a very nice critical effect on it: Critical Shred. When you roll a critical hit with this weapon you can make another attack against the model you just hit. Pretty handy when you are rolling three dice to hit. Under blood magic this thing fully loaded with focus has a decent chance or putting serious hurt on Colossals too. It plays very well with Banes having accumulator with them, so if you are planning on running them you may want to consider a Desecrator.
Units:
This is where Skarre shines. Mechanithralls hit really hard... when they hit. Mat 5 sucks but when you have three dice to attack it's like having mat 8. Combine that with dirt cheap. Add three Brutes for massive P + S 24 combo strikes on feat turn. Add in the need for a Necrosurgeon to collect corpse tokens, heal Skarre and provide ritual sacrifice targets. Now you have a nice package deal for a bargain 10 points.
Satyxis Raiders and Blood Witches also shine with Skarre. Extra dice on attacks mean more chances to get critical knockdowns with lacerators. It also means less need to CMA or gang. Added reliability on the Blood Hag's dispel strike. Power swell with blood magic on the charge can make Satyxis Raiders real powerhouses for a turn. They will be really hard for the enemy to remove on their following turn as well, being high defense with force barrier to boot. Lacerators have feedback built in and it stacks with backlash for two damage to the enemy Warcaster when damaging their jacks. Best of all Satyxis are very fluffy.
Bane Thralls and Knights go well with pretty much any Cryx caster. The beauty of using them with Skarre is that she removes the need for Tartarus' mat buff. Being weapon masters already adding Skarre's feat makes them crazy good at killing anything in front of them for a turn. And being able to use the Thralls as mobile debuffs (dark shroud) can come in handy.
Bloodgorgers can work really well with Skarre if you are already considering Gerlack. They have a build in movement buff which is nice and Skarre cuts out the need for gang. Since they are on medium bases it can be hard to get gang to work effectively. They have two attacks each meaning if you put a pair of them on a target you most likely will lose some of your attacks. But medium bases also mean they can screen Skarre and her key support models pretty well.
Any melee based infantry can work well with Skarre given her buffs to hitting and damaging enemies. I do believe that the ones listed above are the best choices though. And any Cryx army can benefit from a unit of Bile Thralls.
Creid over on the Privateer Press forums has pointed out that Soulhunters and Darragh Wrathe make an excellent combo with Skarre. They have the ability to become incorporeal when starting their activation in Darragh Wrathe's command range. Being cavalry they can ignore smaller bases when declaring charges witch allows them to get where you want them quite easily. The downsides are that they have large bases making it difficult to squeeze them in on your target, maybe too difficult to get more than one or two. They are very expensive in points. They also don't hit overly hard witch is where blood magic comes in. Add dark guidance to make sure that one or two Soulhunters hit their mark and now you have some serious assassination threat.
Solos:
The Skarlock Thrall is pretty much a necessity for ritual sacrifice. When not sacrificing models he can also dish out two different attack spells and a backlash. Speaking of ritual sacrifice the next solo to recommend is the Scrap Thrall. You get three for each point spent. Dirt Cheap. They can do all kinds of tricky positioning things and make wonderful sacrifice targets.
Warwitch Sirens are handy in any Cryx army. For Skarre they fulfill the same function as they would for anyone with one difference; shadow bind is a lot more reliable.
Bane Lord Tartarus, another model good in most Cryx armies. Not as needed with casters who can help their armies hit stuff but still an awesome piece to have. He does add a movement buff to Banes that Skarre can't. And under the effects of dark guidance and blood magic he can thresher like no other.
General Gerlack Slaughterborn's killing spree just got a whole lot better with three dice to hit. It is a real bummer when you roll that snake eyes during a killing spree. Or perhaps you roll a 3 or 4 when you needed just a tiny bit more. Anyway, Gerlack is a monster in melee and if you combine that with a caster who buffs melee troops he will shine even brighter. He offers up some nice abilities to Bloodgorgers too if you have them.
Now for the Satyxis Raider Captain. She is a high speed weapon master with a lacerator. If that is not enough she can make Satyxis Raiders faster and gives out no knockdown to Satyxis models. Important note: Skarre is a Satyxis Warcaster. No knockdown for my high defense Warcaster? Yes indeed.
Mercenaries:
I find that Gorman is very useful to Skarre. He can screen her with his smoke bombs as his primary function. When battle closes in he can blind models to effectively take them out for a turn or help lower the armor of enemy jacks. Very useful, the only downside is that Gorman might have a hard time keeping pace with Skarre since he is slower than her.
Saxon Orrik is also very useful to Skarre as he can give a unit pathfinder. Skarre doesn't have the luxury of handing out ghost walk like many other Cryxian casters and this guy fills that gap.
Conclusion (TLDR):
Skarre is a beast. She can hit like a ton of bricks with the proper support and spells/feat. Her army can hit reliably and very hard on feat turn. She can assassinate in melee or if you get a lucky ritual sacrifice roll, spells as well. She can run jacks comfortably with the added focus from ritual sacrifice. She save you lots of points, taking many dirt cheap units and turning them into powerhouses. She may not be as "tricksey" as other Cryx Warcasters but she is definitely able to run with the best of them. If you just read the entire post I applaud you. And thank you for taking the time to read it.
